In another article, I described the joys of making maple-sugaring spiles from sumac branches. “Spiles” are the little spouts that allow maple sap to be collected from maple trees in the spring. Once having handcrafted a few spiles in the dead of winter, the temptation to collect maple sap at the earliest signs of spring becomes irresistible, and provides a perfect excuse for spending several hours by a bonfire. This article describes a simple way to collect maple sap from your maple trees and make it into maple syrup, over a roaring fire.
Tapping
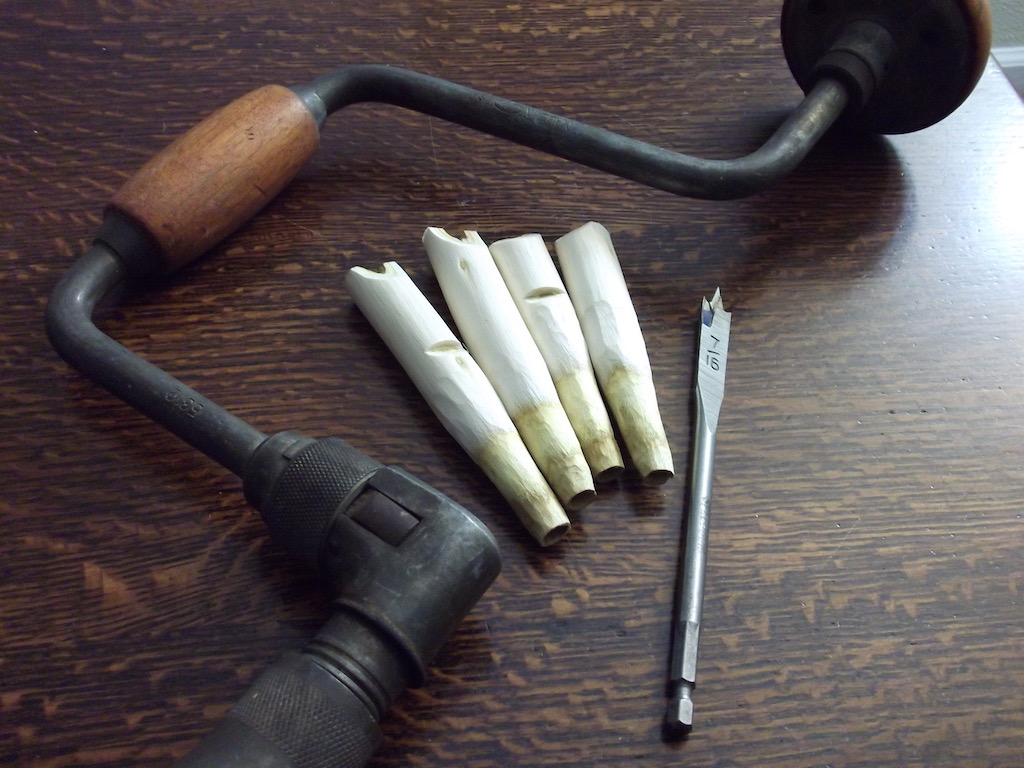
The first step, of course, was to obtain the spiles. Good luck trying to find maple sugaring spiles at your local store! I made the spiles depicted below from sumac branches that were growing outside. They cost nothing, and worked perfectly. The process of making them is detailed in the other article. You will also need a 7/16 drill bit, and something to drive it with. I used a charismatic antique brace-and-bit, but a power hand drill will also work, if it’s battery powered, or the cord stretches far enough to reach the tree.
Collecting
I am not going to go into the details of how to identify a maple tree, or how to know when it’s the right time to collect sap. But you must be sure that you have the right tree species, and that the sap is running. Sap runs only for a very brief period in the late winter or very early spring, and only when the nighttime and daytime temperatures have been oscillating between below freezing and above freezing. This causes the sap in the roots to be driven into the tree. When you are pretty sure this is the case, then drill into the tree to a depth of about one inch or just a bit more. Gently insert the spile until it stays in place and will not leak around the entry hole. Don’t split the wood at the hole by pounding it in too tightly. Just a firm but gentle pressure will do it, if you cut the spile properly.
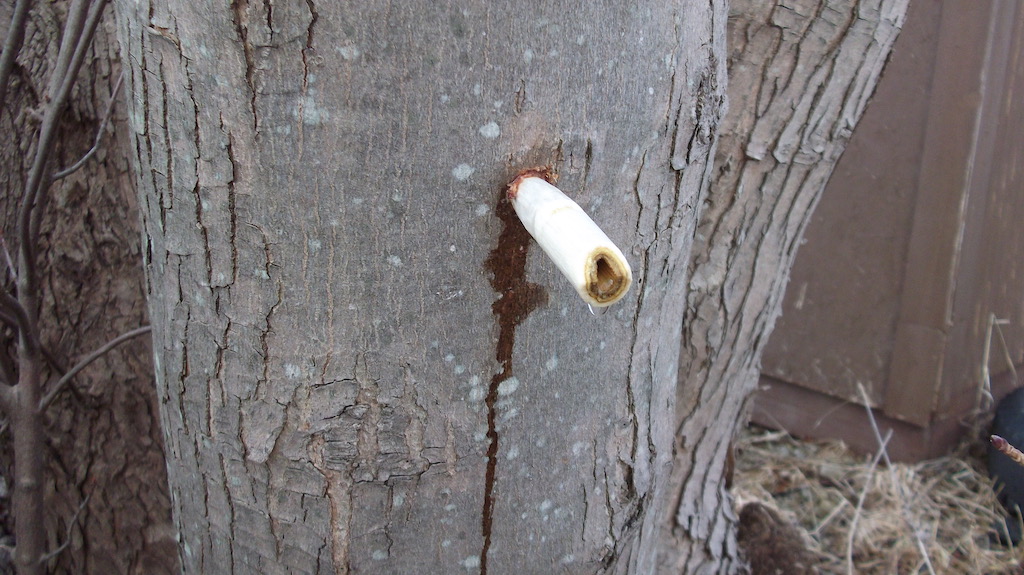
Nailed it! The tree was eager to give. A little bit leaked around the tapping hole before I managed to find the spile and insert it.

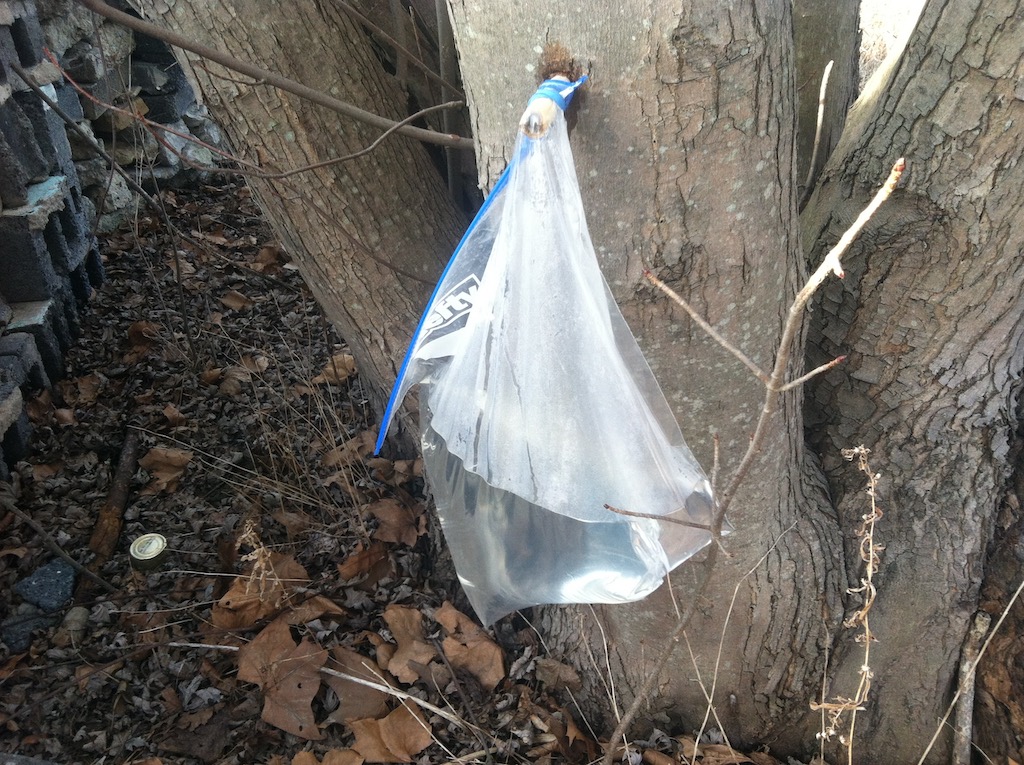
The sap drips slowly and irregularly, when the conditions are right. I used 2.5-gallon white plastic jugs, like the kind that cat litter is commonly sold in, to collect the sap. I cut a hole in the side of the jug for the spile, and hung the jug on the tree — impaled on the spile, and held with a bungee cord around the back of the tree, as shown above. And, as shown below, I also tried hanging a 2-gallon ziploc bag from a spile, using a rubber band to bind it to the spile. That worked too, although there is a chance the spile could pull out from the weight of the collection bag. Use your own judgment.
It took several days to collect enough sap — I wanted about four gallons. Daily, I would go out to the trees and gather what had collected in the jugs, and placed it into a collection bucket that I then lidded and left outside because the weather was cold enough to keep it fresh. After I had collected enough, I took the spiles out of the trees. It is not necessary nor desirable to plug the hole with anything. Once the spile is removed, the sap flow slows down rapidly as the tree begins to heal the injury. The holes I made were completely grown over by midsummer. A 7/16 inch hole is small enough to heal quickly, and is the standard size that traditional maple sap farmers have always used.
Uh-oh…
On the day I made the syrup, it had been below freezing overnight, and I found that part of the contents of the collection bucket had frozen. But this was good news! It meant that less boiling time would be needed, if I pulled out the ice and discarded it.
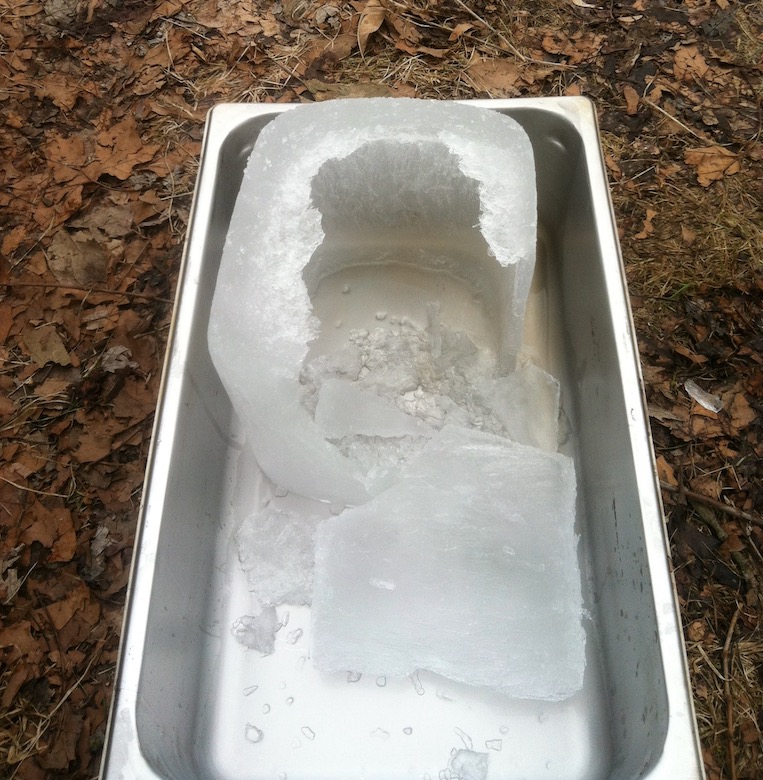
Of course, this freezing thing is not part of the normal syrup-making process — but it’s interesting to mention. When a sugary solution like maple sap begins to freeze, the part that freezes first is primarily pure water, with the sugar content remaining largely in the unfrozen liquid. This is called fractional freezing, and was often used by early New England settlers to increase the alcohol content of their ciders and meads. It also works to concentrate sugars, as with ice wine. The ice, being almost pure water, is discarded, leaving a more concentrated liquid behind.
So I discarded the thin layer of ice you see above, that had formed in my sap bucket. But only because just a little ice had formed. There is some sugar in the ice, and the proportion of sugar in the total amount of ice will fractionally increase as more of the mixture freezes (after all, maple sap will freeze solid if given enough time). But when it’s just a thin layer of ice around the edges, chances are it’s mostly water, and you can discard it, if you want to get a head start on the boiling process.
Boiling
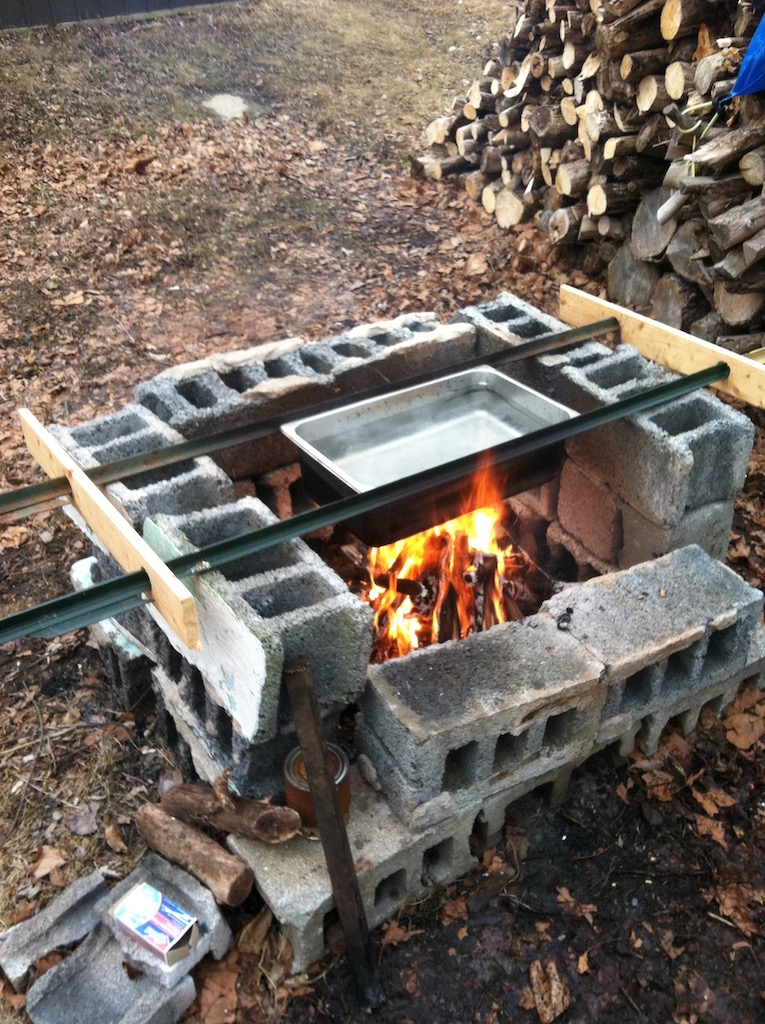
I already had a fire pit built of old cinder blocks, about three feet square. The biggest technical obstacle was finding a proper boiling pan — a large container that could be suspended over the fire — and then, how to suspend said container over the fire. The container I selected is a five-gallon steam table tray, approximately 20 inches long by 12 inches wide by 6 inches deep, made of stainless steel. These can be found at restaurant supply stores for about $50 or less.
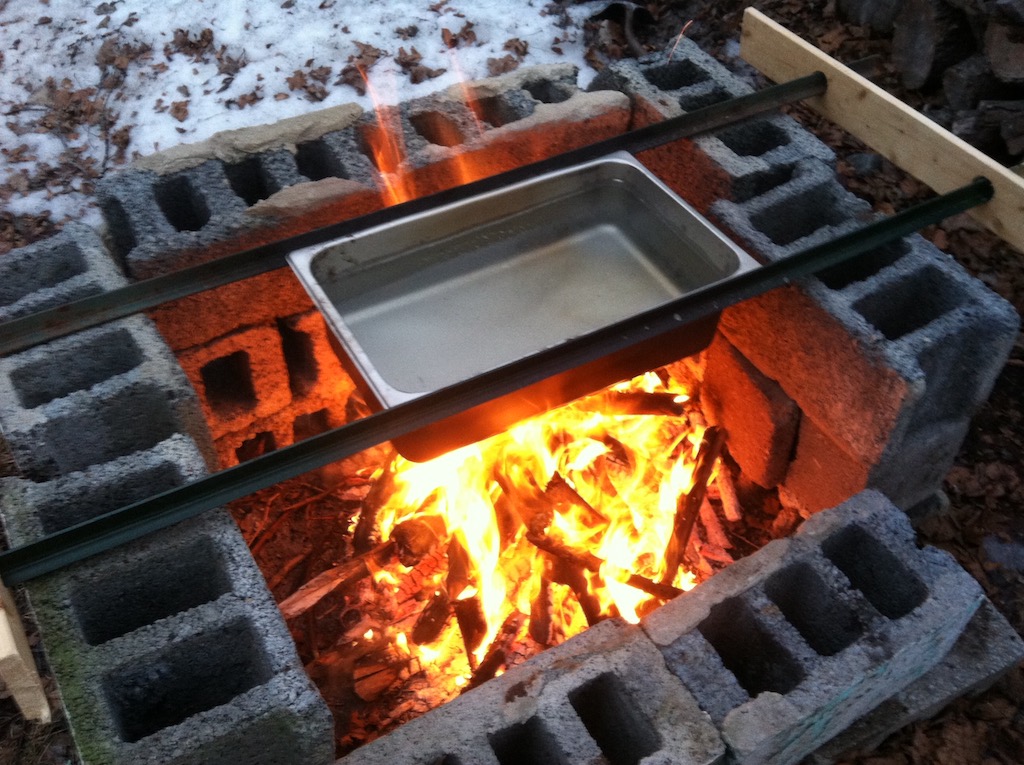
The boiling pan was suspended across the fire by two steel T-posts, which are used for farm fences, and can be found at any large home improvement store. The T-posts are separated by two 1 inch by 4 inch boards. Two 1.5-inch holes are drilled through each board to receive the T-posts, holding them at the proper distance apart so that the side flanges of the pan can be suspended in the channel formed by the center flanges of the T-posts. I’m not sure if all steam table trays are built to the same dimensions — they probably are, I would think — but if you try making this, you should buy the tray first and make the measurements yourself. For my 21 quart tray, nominally about 13 inches wide but which had slightly tapered sides, the right distance was slightly less than 13 inches on center.
Above, you can see about four gallons of sap beginning to get warm over the fire. Below, it’s finally reached a boil, about 15 minutes later.
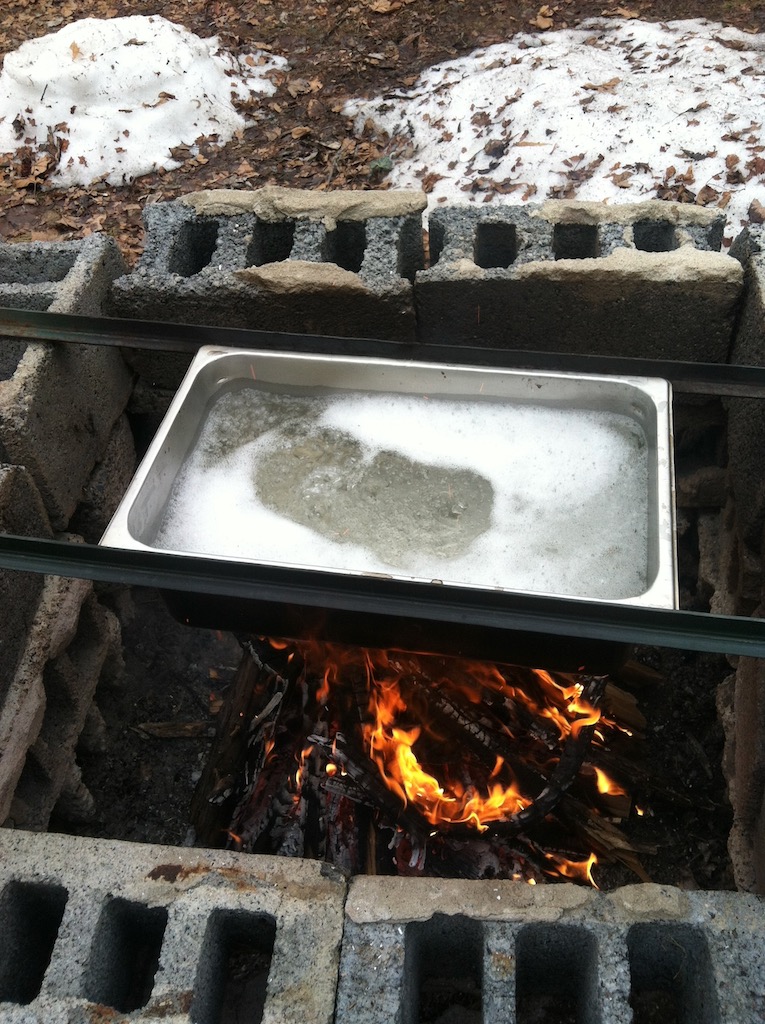
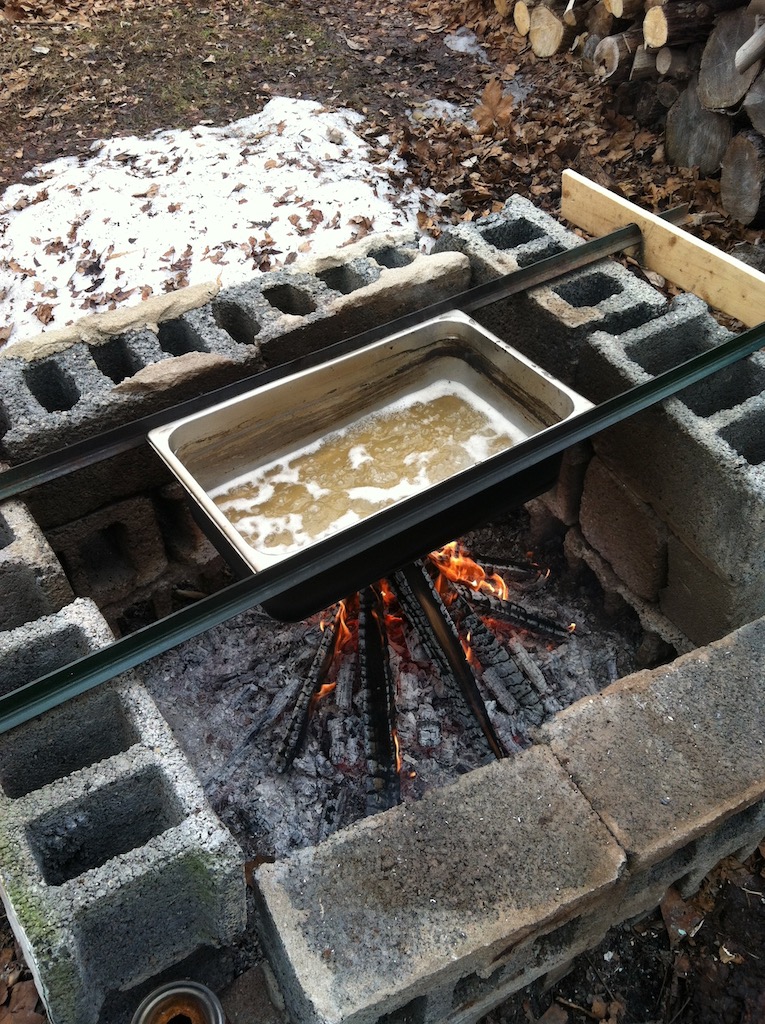
It took roughly two hours and a decent amount of wood to reduce the sap. You can see that it has turned a nice caramel brown, and continues to boil under the now subdued fire. Admittedly, you have to be very attentive to the fire, and quite skilled at regulating its intensity for this process to work.
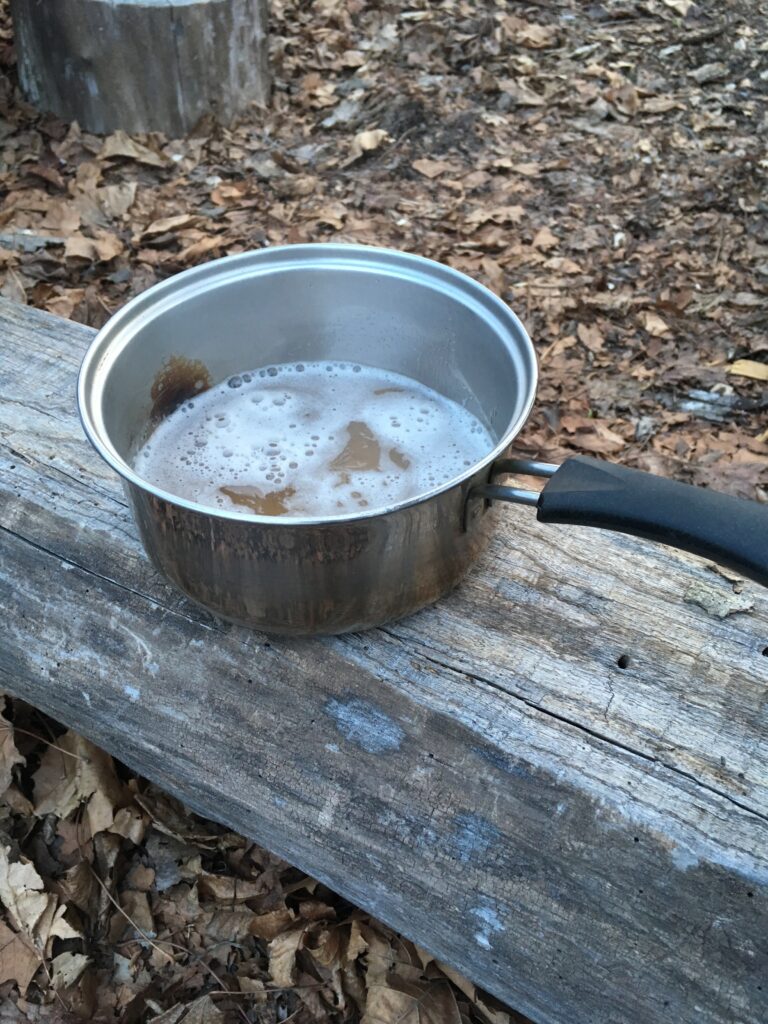
Finally, when I was convinced that my fire regulation skills were not advanced enough to avoid scorching the rapidly thickening syrup, I got a thick pair of leather gloves and two pairs of pliers, and carefully lifted the HOT steam table tray off of the T-post rack, and then poured the contents into a saucepan. I finished it off over a gas flame in the kitchen. Maple syrup is done when a thermometer indicates that it is 7 degrees Fahrenheit above the temperature of boiling water at your elevation — nominally, 219 F.
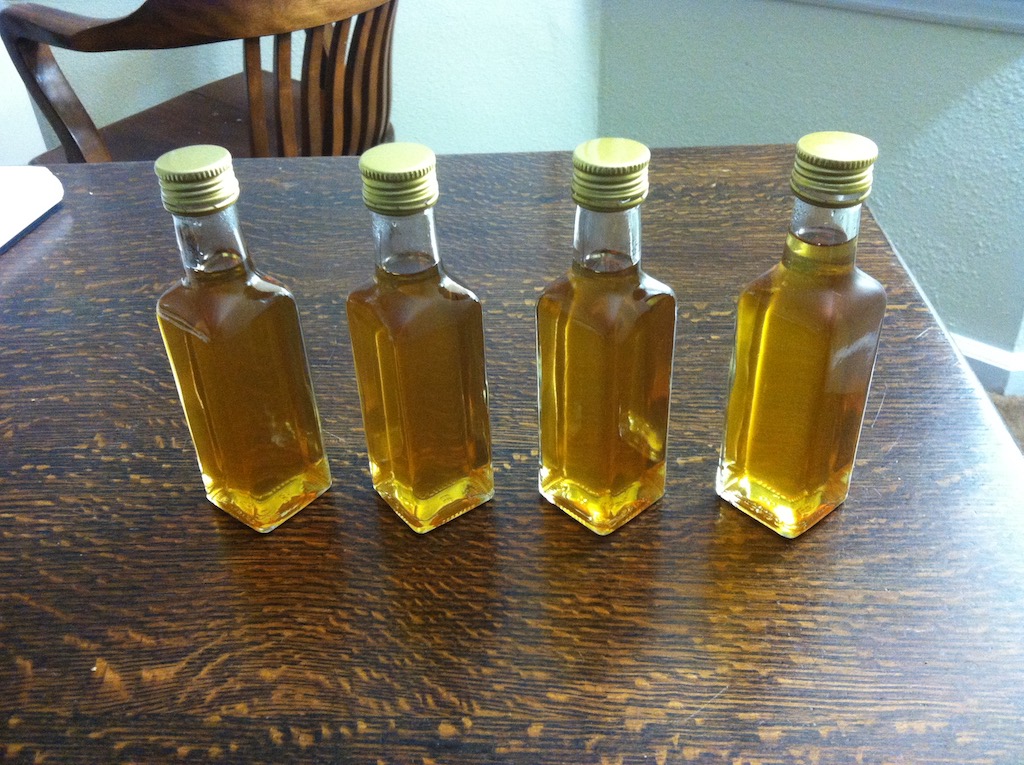
This was the yield — about 400 ml of syrup — from about 3.5 or 4 gallons of sap collected from a number of silver maples and Norway maples (not including a little that got left in the pan or was sampled during the process). I chose these bottles because they are 100 ml apiece — the largest size that can be carried on a plane — because I wanted to gift them to far away friends. All told, I estimate that the reduction ratio was about 40 to 1. Low yield? Yes, but on par. The ratio might have been better had I collected the sap of true sugar maples — silver maples and Norway maples have lower sugar content than sugar maples. But their syrup was every bit as delicious as anything I had ever bought from the store.
This article describes my personal experience of making maple syrup, but I benefited from a lot of background knowledge that I gathered beforehand and am not reporting here. Before collecting sap and making syrup, you should do more research to make sure you are tapping the right trees at the right time and doing everything safely and responsibly. I recommend reviewing the process as described by the Massachusetts Maple Producers Association, which I find to be accurate and straightforward and most refreshingly, ad-free. Happy sugaring!


3 Comments
Pingback:
Kasia
I boiled down some sap on an open fire and the result was an extremely Smokey smelling concentrate. Is it safe to continue? Or should I discard? Safe to consume smokey maple syrup? Otherwise, the liquid looks good! Thanks
Mike
Hi Kasia, congratulations on getting a batch boiled down! My syrup tasted smoky too. This is how it was made for generations, so I’d assume it’s perfectly normal for the process, and no less safe than anything else cooked or smoked over a wood fire.